Manual takeoff workspace
Measures and prices plan quantities with nested material folders, personal panes, a full ledger, editable text and note discussions. The quickstart covers live assembly calculations, saved-version comparisons, repeated rooms and angles.
Use the workspace to build an auditable quantity estimate from drawings: lengths, areas, pitched areas, volumes and counts can be reviewed before pricing.
Before you start
Availability: Takeoff, Business and Enterprise plans. Enabled business features, role permissions, connected providers and supported devices may add requirements.
Documented roles: Owner, Office. A role name alone does not override the permissions set by your business.
Where to find it: Takeoffs > Manual tools.
Select the correct drawing and revision. Open Settings > Measurement units to choose m, cm, mm, km, ft, in or yd, then calibrate against a known dimension. The display converts lengths, areas, volumes and their rates. New US takeoffs default to feet; AU, NZ and Canadian takeoffs default to metres. Each saved drawing keeps its own selection. Name measurements by trade, material or work package so the ledger stays understandable.
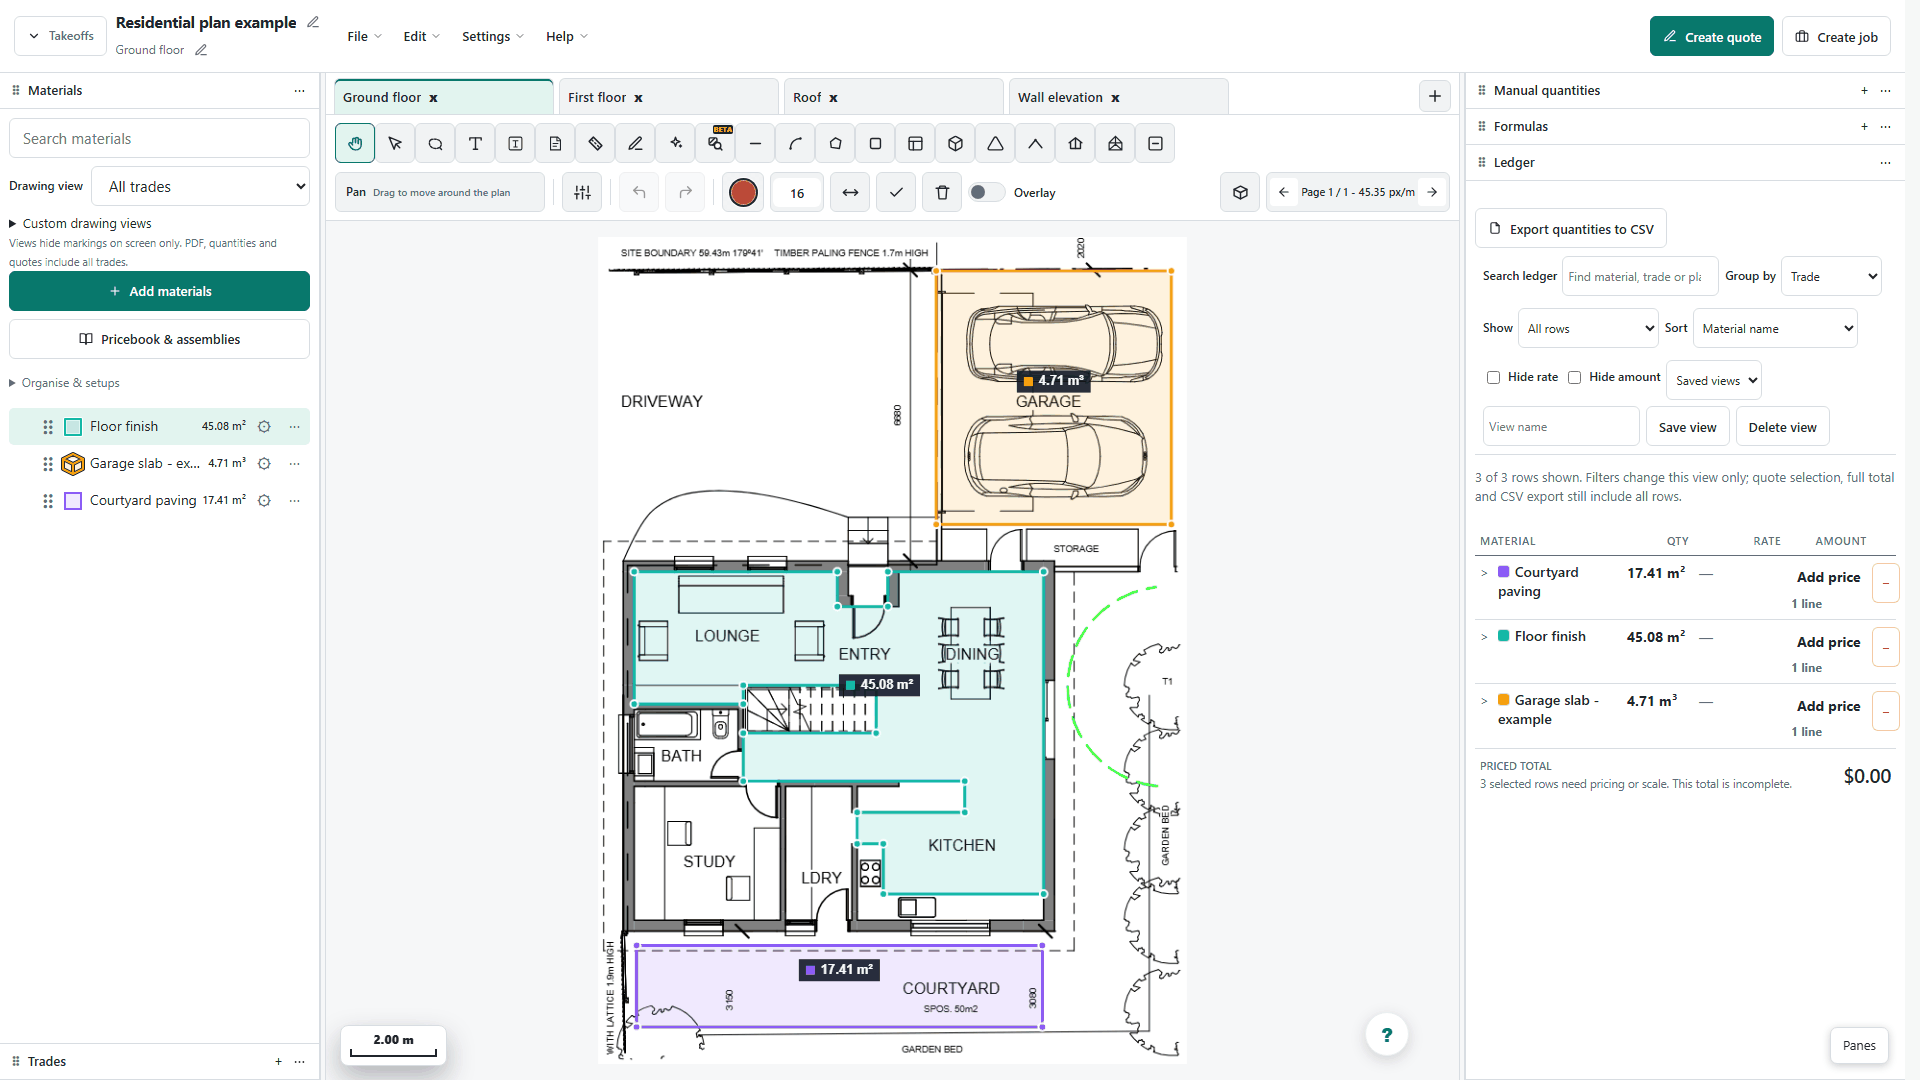
Step by step
- Open Takeoffs, create or open a takeoff, then upload a PDF, JPG or PNG plan or use a plan already linked to the job.
- Check the page scale, then choose Line, Area, Pitched area, Volume or Marker. In the fresh material picker, choose a compatible material or Draw unassigned before marking the plan. Line > Other sources > Smart piping selects a saved pipe pack.
- Choose Text and click the plan where the note belongs, then type the note directly in place.
- Review each measurement and the live ledger, fix anything that is off, then save before inserting priced rows into a quote.
- Right-click a measurement for the actions available to its type: Edit points / properties, Duplicate, Add deduction or Apply as deduction, Convert to pitched area (which opens the Roof pitch prompt), or Delete. On touch, long-press instead.
Worked example
Use nested folders for floors and rooms, then arrange Materials, Trades and Ledger panes around the drawing. Place a note marker, double-click it for the editable pane, attach an image and post a comment. Text and note annotations can be moved and resized with Select; notes do not change quantities or prices.
This is an illustrative scenario. Use your own approved scope, quantities, rates and business rules.
Check the result
Check a second known dimension, then compare ledger quantities with visible markings. Material settings use Done to save and X or Escape to discard edits. Review deductions, units and Select Linked Item before inserting work into a quote.
Limits and troubleshooting
Drawing quality and calibration affect the result. Cropping does not preserve a paper-size preset. Assisted selections still require review, and an unpriced measured item is not a complete estimate.
Follow the screenshot tutorial: Start-to-finish takeoff quickstart
Open the complete takeoff walkthrough with volume, formula, assembly and overlay examples
Using the mobile app
The screenshots above show the web interface. These guides explain the separate native app screens and their limits.
Check current plans and feature availability · Browse every guide